Showing posts with label sewing. Show all posts

Tuesday, 4 November 2014

Steampunk Wedding Dress - Bustle Bling!

After I finished the brown apron skirt, I started on the decorations for it! As it was, it looked very dull and like it was sorely missing something, so I played around with different ideas and ended up with a two layered solution. The first layer was simply half circle, brown silk lined with green, which I folded on either side. The other layer was a little more complex. This too was two sided, green on one and brown on the other, and involved both buttons, a thin golden rope (it was originally too thin, and I hand spun it to twice the thickness) and handmade golden tassels.

I made a pattern with the rope, pinning it in place while I hand stitched it on, as well as the buttons. Then, I attached the tassels to the rope. Realizing that the piece I had made wasn't wide enough for me to attach it to the buttons on the skirt with button holes, I stitched on a loop of gold rope on either side and made a button hole on the middle of the top ridge.

It's all a little difficult to explain, so here's some photos of the result that may help you visualize it:


Steampunk Wedding Dress - The Brown Apron Skirt

Gosh, I am so waaaaay behind on my blogging! It's been a little busy lately as the wedding was last Friday and the entire week was spent in England with limited access to internet and a lot of preperations to do!

When the wedding photos arrive, I'll be posting up some proper pics of the dress in it's full splendour here, but let's not get ahead of ourselves. ;)

First up! The making of the brown apron skirt, which went on to of the green skirt.


Yet again, I made a cotton mock-up first to have a pattern to go by. I based it off the mock-up for the green skirt, but with some quite considerable changes. The back of the skirt had no gathering and consisted of three smooth panels with a hint of a mermaid cut. the front part was made out of three panels as well with some extra width as it was to be gathered vertically where it met the back part of the skirt, and at the two seams of the middle panel, I made upward folds where I later stitched on buttons to hold them up.


I made the closing relatively similar to the green skirt, only without any buttons. Instead, I made it so that it attaches to the buttons of the green skirt, which also makes sure that it doesn't slide out of place. On the bottom of the back panel, which forms a bit of a train, I added more ruffles and a brown velvet ribbon for some texture contrast.

On the  sides, where the front panel meets the back panels, I added handmade flowers (made from the same green silk as the green skirt) with facet cut beads to hide the seam and add some colour contrast and bling!


Wednesday, 3 September 2014

Elf Cuffs & Fantasy Stuff - An Etsy Shop Re-Launched

I've recently just re-launched my Esty Shop, "Chameleon Candour - Elf Cuffs & Fantasy Stuff"! There's not that much there yet, but there is much more to come! Here's a little look at the stuff I've made available for purchase so far:

First up, a pair of what I call "Elf Cuffs", in a rusty orange coloured wool, with wool yarn felted into the base to make a pattern:

Second, another pair of Elf Cuffs in the same type of wool, but these are decorated with crochet flowers:

Thrirdly, and lastly for now (but not for long!), is a my signature leather belt (seriously, I wear this pretty much all the time)! It's not in stock, as this is made to order, and I tailor it to fit spesific measurements:


My sewing and crafting has mainly been a hobby, but it is as costly as it is time consuming, so I've decided to start selling certain products that I've received positive feedback on, in hopes that this hobby might actually start earning me a little money as well. I won't lie, it would be a dream come true if it turned out I could partially live off running an Etsy shop!

I would therefore be beyond thankful if you, my kind readers, would pop by it, have a look around, and, if you like what you see, favorite my shop and share it with your friends! And, of course, buy things from it, if you see something you want! ^_^

http://www.chameleoncandour.etsy.com

Tuesday, 2 September 2014

Steampunk Wedding Dress - The Green Skirt

With the essential undergarments sorted (I already have a pair of bloomers and a chemise I can use), I turned my focus to the skirt and apron skirt. I’d already bought tons of cheap cotton and made a mock-up  to see approximately how much material I would need. Then I set off to get the fabrics.

I found raw silk in the perfect colours; a mossy green and a nougat brown, and bought 4 meters of each in total (later I had to run back to the store to buy another meter of the green, however, as I was running short). Raw silk is amazing to work with, light and pliable, and yet textured and crisp.

Using the deconstructed mock-up as a pattern, I cut out the pieces and started putting it all together.

I hit a wall, however, when I was trying to decideon the best type of closure for the skirt. Should I make a side opening, like I did with the petticoat? That would mean it would be potentially visible should I choose to wear the skirt without the apron skirt over it, and it didn't really allow much room for adjustment should lose more weight. Instead I went for a different solution, (which also turned out to be very useful later) basically making a "flap" out of all the gathering in the back which can be attached to the waist band through buttoning. It's a bit difficult to explain, but on the picture below, you can see pins where I later placed the buttons (one on either end of the "flap" and one in the dead center):


Here's another picture showing the hand stiched split and the gathering before the band was sewn on:


The gathering had given me a lot of material in the back to work with and make a bit of a train, but instead of meeting the floor in a soft curve towards the floor, the excess material just rumpled up in a creased pile. I remembered how American Duchess solved this issue with the Green Acres gown, and followed suit, inserting a godet at the center as illustrated by the photos below:


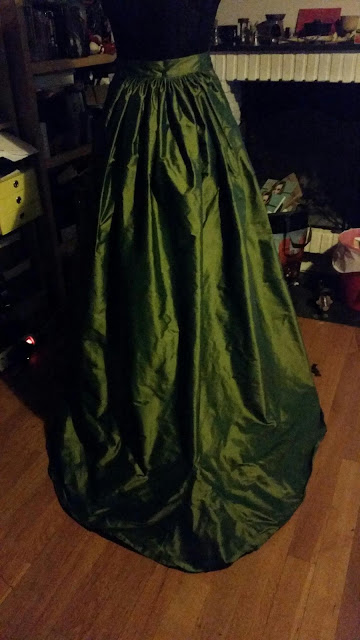
Here's a shot of the the back of the skirt after I had finished off the waist (minus the buttons) and hemmed the bottom:


Having finished the base of the skirt, it was time to move on to the ruffles! Raw silk is dreamy to work with when it comes to folding and pleating, but for all it's crispness, I still needed to stiffen the ruffles with starch to make them stay, just ironing them didn't do the job. 

Before I startched them:

After I starched them:

The difference was tremendous! With the starch the ruffles kept their sharp neatness and stayed in place. If you don't have any starch nearby, do not fret! You can do like I did and make it yourself! Just use water and corn starch, mix them together and put it all in a clean spray dispenser. :)

I'm considering a second row of ruffles (as indicated by the second chalk line, but I haven't quite decided yet.


Thursday, 26 June 2014

New project: Fire Elsa

Like pretty much everyone else, I've been enthralled by Disney's Frozen, and like everyone else I've been singing Let it Go on almost a daily basis. However, the cold really does bother me, and so a while back, I made a fire version of the song and the idea struck me that it would be pretty awesome to make a cosplay to match it! And so started started the process of Fire Elsa!

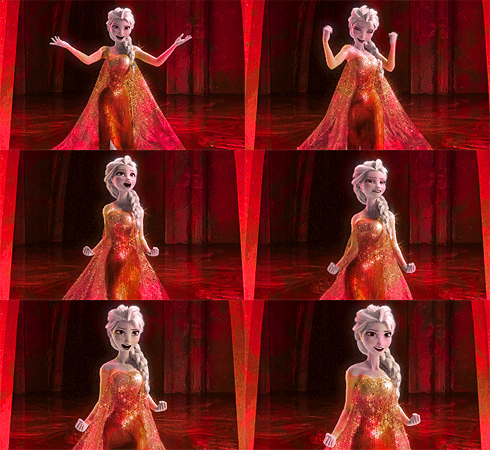
Inspiration:


I started planning it quite early this year, picking up material that could potentially work from fabric sales and such, but in between finishing Tauriel for Desucon Fantasy for mid April, and suddenly deciding to update Kili for HobbitCon, time slipped through my fingers and I never got the chance to start working on it. Then, a few weeks ago, having originally planned to just go for Kili all of Desucon 9, I dived into it, not telling anyone, thinking that if I finished it, I'd use it, and if I didn't, no one would be the wiser.

I already had a dark orange skirt that could work, so I started out with the top and the corset. I actually tried out two different materials for the top before I decided on a third one, the same material as the train would be made of.

Here's a sample of some of the materials I used:


This photo really doesn't do justice to all the sparklies of this material!


 The corset was a bit of tricky business, though. I used an old corset as template and cut out pieces, realising too late that it was cut far too low for my bosom to function properly, let alone look even remotely decent. So, I added an extra piece which also accentuated the sweetheart cut, and allowed me to hide a bra underneath it all, which really helped! The modesty panel in the back had to be redone as well, having miscalculated and made it too small first time around, but finally, it fit and looked as it should!


I moved on to the train that flows from Elsa's corset. Made out of soft and extremely sparkly tulle, it needed no hemming and I could cut freely. Attaching it to the corset was another story all together, however. Though the tulle did have a certain amount of stretch in it, it would not be enough by far to allow for the gap I would need in the back to put the corset on before lacing it. I considered several different options such as using an elastic band, making it somehow detachable, attaching it to the top instead of the corset, but landed on hand sewing the train on to either side of the corset, all the way back to where the lacing began and leaving a lot of material in the back, which I then stitched on around the top lace of the lacing. It allowes for the material to be naturally gathered up when I lace the corset up, and looks pretty good as well! :)

This is how the finished result looks, although I might still add some details here and there:


And I couldn't help but to a bit of photo editing fun stuff: