With the essential
undergarments sorted (I already have a pair of bloomers and a chemise I can
use), I turned my focus to the skirt and apron skirt. I’d already bought tons
of cheap cotton and made a mock-up to
see approximately how much material I would need. Then I set off to get the
fabrics.
I found raw
silk in the perfect colours; a mossy green and a nougat brown, and bought 4
meters of each in total (later I had to run back to the store to buy another
meter of the green, however, as I was running short). Raw silk is amazing to
work with, light and pliable, and yet textured and crisp.
Using the deconstructed mock-up as a pattern, I cut out the pieces and started putting it all together.
I hit a wall, however, when I was trying to decideon the best type of closure for the skirt. Should I make a side opening, like I did with the petticoat? That would mean it would be potentially visible should I choose to wear the skirt without the apron skirt over it, and it didn't really allow much room for adjustment should lose more weight. Instead I went for a different solution, (which also turned out to be very useful later) basically making a "flap" out of all the gathering in the back which can be attached to the waist band through buttoning. It's a bit difficult to explain, but on the picture below, you can see pins where I later placed the buttons (one on either end of the "flap" and one in the dead center):
Here's another picture showing the hand stiched split and the gathering before the band was sewn on:
The gathering had given me a lot of material in the back to work with and make a bit of a train, but instead of meeting the floor in a soft curve towards the floor, the excess material just rumpled up in a creased pile. I remembered how American Duchess solved this issue with the Green Acres gown, and followed suit, inserting a godet at the center as illustrated by the photos below:


Having finished the base of the skirt, it was time to move on to the ruffles! Raw silk is dreamy to work with when it comes to folding and pleating, but for all it's crispness, I still needed to stiffen the ruffles with starch to make them stay, just ironing them didn't do the job.
Using the deconstructed mock-up as a pattern, I cut out the pieces and started putting it all together.
I hit a wall, however, when I was trying to decideon the best type of closure for the skirt. Should I make a side opening, like I did with the petticoat? That would mean it would be potentially visible should I choose to wear the skirt without the apron skirt over it, and it didn't really allow much room for adjustment should lose more weight. Instead I went for a different solution, (which also turned out to be very useful later) basically making a "flap" out of all the gathering in the back which can be attached to the waist band through buttoning. It's a bit difficult to explain, but on the picture below, you can see pins where I later placed the buttons (one on either end of the "flap" and one in the dead center):
Here's another picture showing the hand stiched split and the gathering before the band was sewn on:
The gathering had given me a lot of material in the back to work with and make a bit of a train, but instead of meeting the floor in a soft curve towards the floor, the excess material just rumpled up in a creased pile. I remembered how American Duchess solved this issue with the Green Acres gown, and followed suit, inserting a godet at the center as illustrated by the photos below:


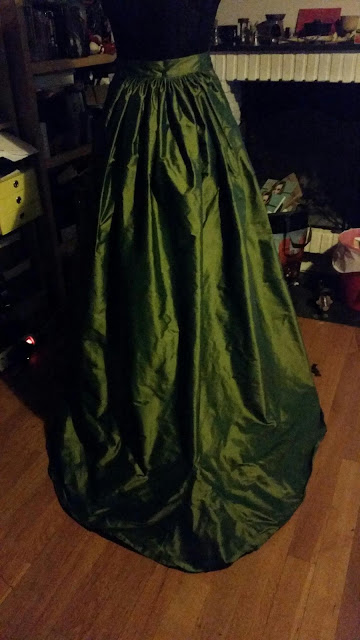
Here's a shot of the the back of the skirt after I had finished off the waist (minus the buttons) and hemmed the bottom:
Having finished the base of the skirt, it was time to move on to the ruffles! Raw silk is dreamy to work with when it comes to folding and pleating, but for all it's crispness, I still needed to stiffen the ruffles with starch to make them stay, just ironing them didn't do the job.
Before I startched them:
After I starched them:
The difference was tremendous! With the starch the ruffles kept their sharp neatness and stayed in place. If you don't have any starch nearby, do not fret! You can do like I did and make it yourself! Just use water and corn starch, mix them together and put it all in a clean spray dispenser. :)
I'm considering a second row of ruffles (as indicated by the second chalk line, but I haven't quite decided yet.


I love that shade of green! I am really into elf/ faery style, I can imagine how amazing that would look for an elf dress! Must save up!
ReplyDeleteOh, me too! Half my wardrobe is fairy/elfy/witchy clothes! I'm sure it would be perfect for an elf dress! ^_^
Delete