Wednesday, 22 January 2014

Kíli Project - Dwarf ears and Kili's sword!

I hadn't planned to do anything about my fella's ears for the costume, as I didn't really have any means to do anything about it and it'd be one more thing to worry about, but then, whilst in the ticket queue, a friend of mine said that she could help me sort it! She's currently doing a course in special effects and movie make-up, and knew exactly how to do it, however, she needed a cast of my fella's ears to make them. So after the queue, we met up and she equipped me with everything I needed to do so!


With the usual bribe of tea, dwarfy boy lay down on the floor and got his ear covered with alginate goo poured into the bottomless q-tip holder I had him hold in place around his ear. It didn't take very long to set, and we could easily wiggle it out of the holder and off his ear. The same process was repeated on the other side, and then I made a sort of wall out of plaster tape around the mold, so I could pour in the plaster to make a cast. A word of advice, though, use duct tape instead. It'a a lot easier and a lot less messy! ;)


After a while, the plaster had set, and I could peel off the alginate, carefully, so I didn't break anything, to reveal two lovely casts!


After that, all that was left for me to do, was to wrap them up and bring them to my friend, who sorted the rest out and made us, not just a set of gelatin ears, but also a silicon mold to go with the casts so that we can make new sets ourselves! ^_^

Now, also whilst in the queue, I was showing another friend of mine a picture of Kili's sword from United Cutlery's collection, and telling her how much I wanted it for the costume, but that it's too pricey for me, unfortunately. She loved it too, and then she surprised me by saying, 'you know, I could probably make that in wood, as long as you can paint it'. I was kind of gobsmacked and asked her how much she wanted as payment for making it for me, and she just said she didn't want anything; she'd just do it for fun! I still feel like I owe her big time, because she really did an awesome job! It turned out to be quite the co-operation project as dwarfy boy helped out with the base coat layer of the paint and did the blade, and then I finished it off by painting all the details and sorting out the leather on the handle. Here's the result:


Sunday, 19 January 2014

Kíli Project - Belt and Hair

Kili's belt. This is one part of this project that I've been dreading and putting off for, like, forever. Not only does it involve having to do a shit ton of hand stitching, it's hand stitching thick leather, and I also have to make all the studs that are to be stitched on. I already had the old belt I'd be converting into this magnificently vicious little number, and removed the original belt buckle a while back, so I started where I had to; making the studs. I'd already made one as a prototype, if you will, but now, I would have to mass produce them as I needed somewhere in the vicinity of 25 of them. Nothin' to it but to do it. Equipped with my favourite biscuits, my faithful Aperture Science mug filled to the brim with coffee and milk and other useful tools, I dived in and got it done!

From there, the path of hellfire lay before me, also known as hand sewing leather. It hurts you wrists, it hurts you neck (because you inevitably end up sitting with you neck craned over whatever you're working on) and it hurts your fingers, sometimes quite a lot, because there are moments when you can't use the thimble, and that's when it strikes, the unexpected needle puncture in you index finger tip, for the umpteenth time. Ok, I'm done ranting now.

The belt buckle was the easy bit. I could just sew that through the holes already there from where the old belt buckle had been attached. The nightmare was all those bloody studs that needed to be stuck onto this leash of doom. I did this by drilling little holes (using a mini drill my fella uses for wargaming miniatures) into each inner corner of each stud, so that I'd have some way of sewing them on. Then I put some glue and stuck it onto the leather. From there, I drilled through the leather as well, so as to spare my hands a little bit. Then the actual sewing began, stitching each corner so that the thread would lie firmly in the grooves on either side of the corner. Repeat 20 something times. You could say I was very relieved and quite pleased with myself once it was done.


Since I had the fimo clay out already from making the studs, I figured I might as well make Kili's hair clip, or at least my version of it. I'd seen one version someone had made of it, and I liked the pattern they'd used, and although I had no idea if it's screen accurate or not (still don't), I decided to use it. I was very happy with how it turned out, and the fact that it's actually functional. :)


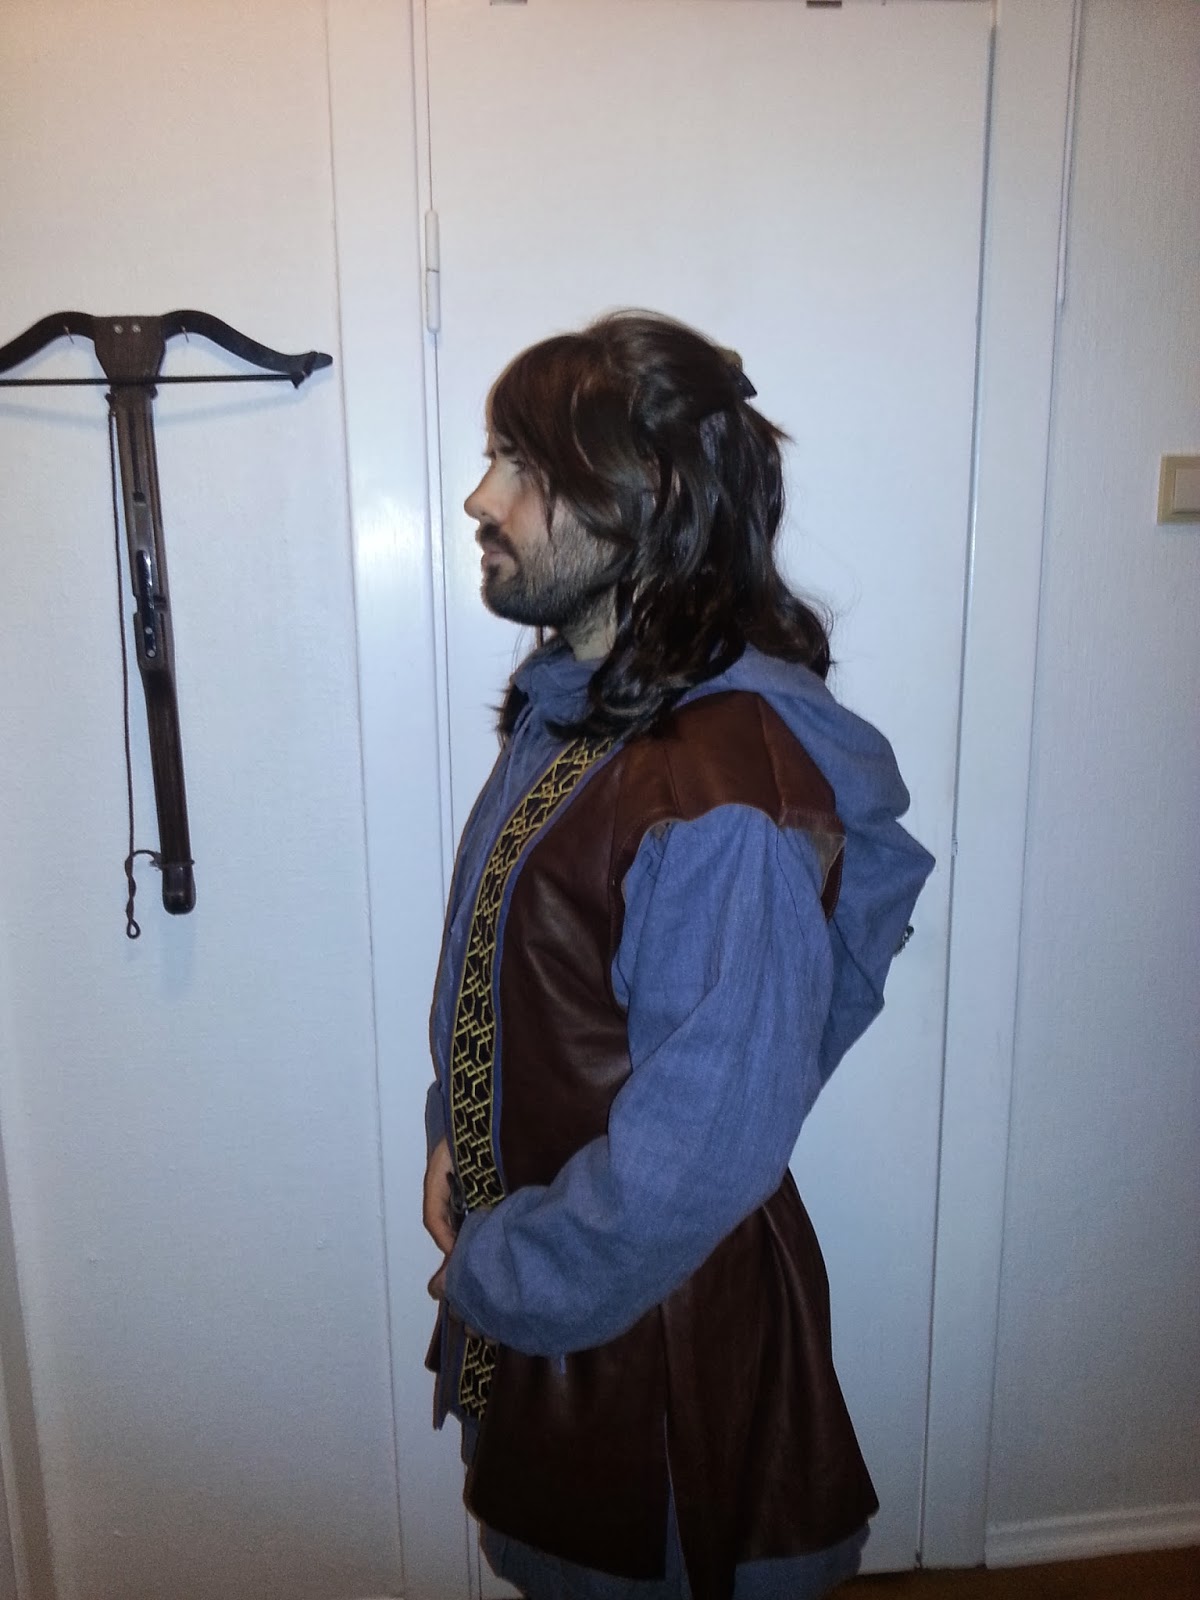
Having received the hair extensions for my fella earlier (his hair was getting rather long but it wasn't long enough, thus extensions), I cut them to the right length and had the poor chap sit down to get have them put in. (He wasn't all too pleased, but as usual, the promise of a brew made him more co-operative.) I must say that the result was perfect, in my opinion, and you could hardly tell which bit was extensions and which bit was his own hair.

This  all happened after having attached the trim onto the leather jacket, but before I stitched the gambeson sleeves on, so here are some photos of how it looked on along with the hair:


Tuesday, 14 January 2014

Kíli Project - Boot covers and jacket

This is a long one and it's got a lot of pictures! But, first off, a tiny update on the boot covers: This is how they looked after I finished them:


Moving on, I started from scratch again with regards to Kili's jacket because the split leather was simply too thick and the suede finish just didn't work, so instead I found two pairs of leather trousers in a second hand shop and got them for a very decent price. They were so fabulously 80's - early 90's that I had to take a photo of at least one of them:


What's more, one of them had a little colourful surprise:

If this is not the worlds ugliest lining, then I don't know ...


I took the trousers apart, splitting each into four pieces, which I then shuffled about and stitched back together again to make the basis of the jacket. Once that was done, I needed to finish the trim to be able to continue, so I picked up where I left it last time and started to add the blue material to the edges:


 I realized quickly that it wouldn't look very good if I simply stitched it on, either by hand or machine, so, instead, I did a second layer of the golden zig-zag seam, only a tiny bit wider so as to fasten the blue material along with it.

Once that bit was done, I hand stitched the material to the backside so that it would look all nice and neat with no visible seams on the front.

When that was done, I started the work of fitting it onto the base of the jacket:


Having carefully pinned it to the leather, I proceeded to stitch it on by hand, and I tell you, this is a job where a thimble, a pair of hobby tongs and a lot of patience is needed!


As you can see on this photo, I decided to attach it so that the trim was sticking a bit outside the leather. This was simply because I hadn't had enough leather to get the exact width I needed, and this added the missing inch.


Because I know it's something Kili cosplayers have been discussing, I thought I'd address the matter of the trim vs. neckline issue by showing how I approached it. I went for the solution of folding the trim in on itself to make the corners, and I feel like it turned out quite nice.


Once the trim was done, there was only the matter of the gambeson sleeves left. From my research, I had found that these were only partially attached, with gaps under the arms for greater flexibility. I'd trimmed the armholes of the jacket basis with plain, black cotton trimming before I started attaching the sleeves.


 Again, thimble, tongs and patience were my friends, but I'd still say this costume is taking it's fair share of blood, sweat and tears. ;)


That's all for now! Next post, I'll be showing you how I made Kili's belt and pictures from the hair test with what was finished of the costume at that point! :)

Friday, 10 January 2014

Side project: Tauriel - part 2

Before I went back to the sewing, I decided to sit down and make Tauriel's pendant with Fimo clay. It was a fairly easy task and didn't take long, leaving room to make the bracers as well. Here's how they turned out:


Having finished the little bits and bobs, I finally returned to the green jacket to fix the collar and front opening. I made the collar, then cut the neckline before attaching it. Here's how it turned out:


I fixed the front opening by sewing on little hook and eye fastenings all the way down the front, but I don't really have any good photos of it.

After all the seams were sewn, the costume was pretty much done. I'd bought some nice boots some months earlier and had decided to just wear some brown cotton leggings (mainly because it meant I could wear warm thermals underneath to shield me from the Norwegian winter cold), so I couldn't resist trying it all on, even if I didn't have the full hair and make-up!


I took a couple of selfies, but the lighting wouldn't really show off the full costume, so I bribed my fella with a cup of tea and had him take some full figure photos where you can actually see the skirt and the boots as well. :)


Thursday, 9 January 2014

Side project: Tauriel - part 1

Considering I too was going to the premiere of The Desolation of Smaug, I needed a costume of my own. With all the rumours that had been going around about there potentially being a romance thing going on between a certain redheaded elf and Kíli, I obviously couldn't resist the temptation of making my first Middle Earth elf costume, so as a side project, I'd made a simplified Tauriel costume.

I started with the green jacket thing, which I made out of dark olive green linen:


Here's the pattern I made for the sleeves, which are the work of demons, I tell you! I first made a normal sleeve, and then marked up the lines where the new seams would go. Then I proceeded to cut the new seam lines and pinned it together so that I could adjust the seams to make the sleeves fitted. Once that was done stitched it together with big stitches and cut away the surplus fabric. Unraveling the seam, I then had a pattern for the sleeves and could start cutting the linen pieces.

I sewed them together to make sure they had the right fit and went on to make the bodice part of the jacket.

 I simply used a pattern I had from an old jacket design for the torso, and pinned the sleeves onto it when I  had sewn it together (this is the first time in ages that I've sewn sleeves on this way; I usually sew them on before I sew the side seams and the seams on the sleeves).
This is how it looked after I had attached the sleeves. They fell kind of awkwardly whilst on the mannequin, but it looked good when I put it on, so I continued. Cutting the waistline, I measured up the linen for the four "skirt flaps" on the jacket. It was a little trickier than I thought it be, because, I had limited amount of fabric and had to cut the flaps seperatly instead of making the skirt out of one or two pieces, and so it took some adjusting to get them all in the right length and width when attaching them to the bodice.

I got it right in the end though and moved on to the next step, which probably should have been the neckline and collar, but I was still a bit uncertain about how I wanted to do that, so instead I jumped on the next bit item, which was the leather bodice.


Because I didn't have any leather in the right colour, and thus would have to dye it anyway, I went with the light grey split leather I still have a ton of. It's suede, but it's thick and I needed the firmness of it to make it work.


I treated it as a basic corset construction with several panels, and it needed a bit of adjusting before I got the cut right, but in the end it turned out alright.


I made the straps and attached the extra bits on the front and it was done. All that remained was the colour. Now, since I didn't plan on using this costume a lot, I cheated and decided to just spray paint the fuck out of in, so (almost) one can of fur brown spray paint later, this was the result, and I figured it was close enough. After all, this was a side project to Kíli and I didn't want to spend too much time on it.


In between sewing and spray painting, I managed to fit in some time for a hair test. I can't stand wearing wigs, and If I can avoid it, I will. In this case it was pretty easy, as I have a very similar hair colour to the one Tauriel has, and it's now grown long enough to reach just underneath my shoulder blades. Yes, Tauriel has hair down to her knees (which is a practical nightmare if your job is to engage in combat, but I guess elves have magical hair that doesn't get caught on things or slap you in the face :p), but I figured I wouldn't want screen accurate length if I was to sit in a cinema most of the time whilst wearing this costume, anyway, so I just went with what I already had.

Doing the hair test made me thank the powers that be that I've been doing strength classes all year, 'cause the amount of strain this hairdo puts on your arms is insane! Turned out alright, though I found out that the side braids were in fact twisted and not braided, which I did for the premiere night.

I'll show you how it all turned out in part two! :)